The Discord API


Imagine a chatroom for your hobbies. Discord is a free app for voice, video, and text chat. It's like a mix of forums and instant messaging, with voice chat for hanging out. Popular among gamers, Discord has communities for nearly any interest.
Discord can be even more! Imagine little helpers that run the chatroom. These are bots, automated programs that can play music, welcome new members, or even run games! They can liven up your server, handle tasks, and keep things fun for everyone. The coolest part? You can create your own bots. You can design these tiny helpers to fit the exact needs of your community.
Discord lets you build your own bots with their API (Application Programming Interface), basically like mini-programs that can do almost anything a regular user can on the server. Imagine bots that can crank up the tunes, greet new folks, or even throw down in a trivia battle – all without you lifting a finger.
Ready to level up your Discord server? This blog will guide you through The Discord API, showing you how to build your own bots and automate tasks.

Before starting, there are some prerequisites -
- NodeJS
Building Your First Discord Bot: A Step-by-Step Guide
Sign in on Discord-Developer-Portal with the ID and password you used to sign in on discord.
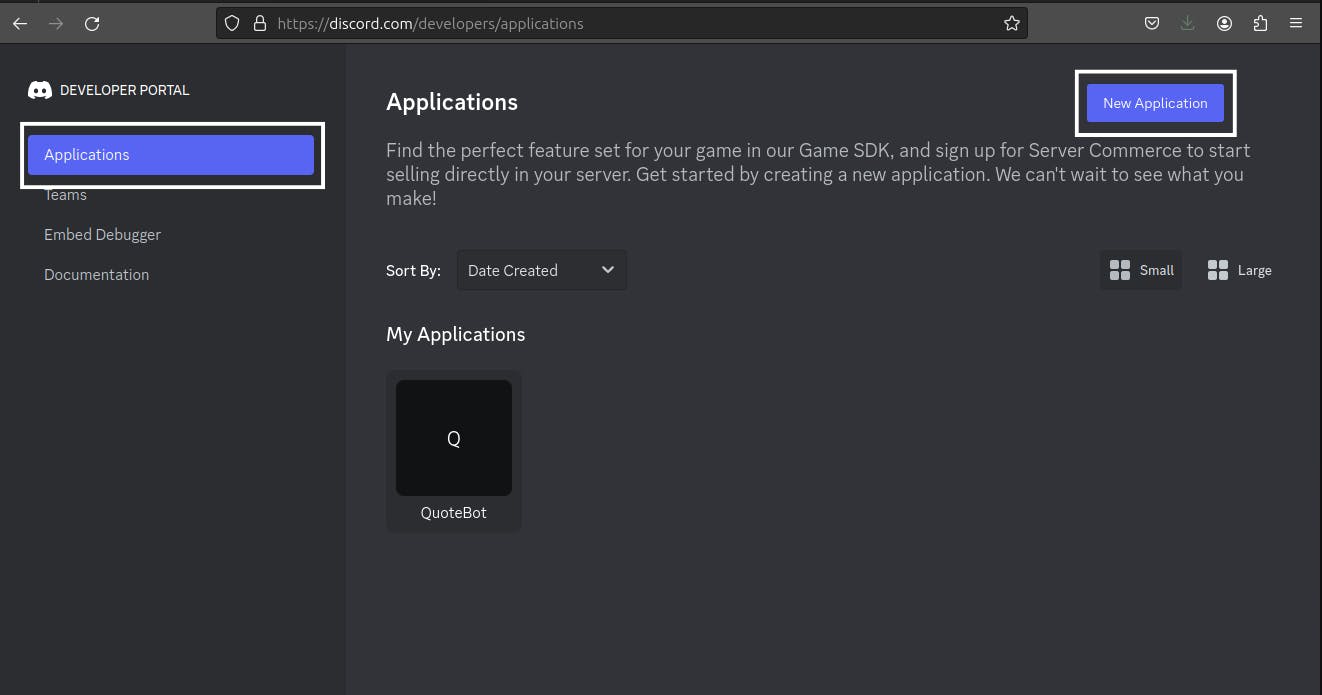
Go to the Applications and create a New Application. Give your bot a name of your choice.
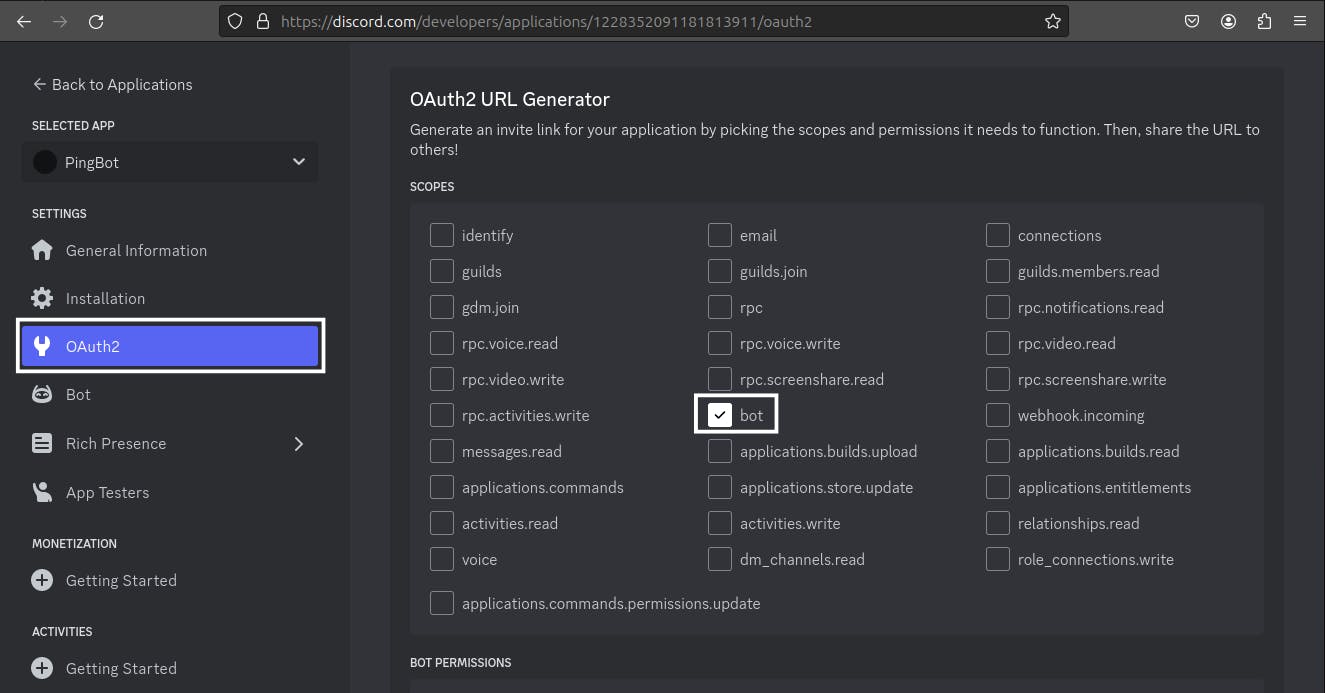
Go to the "OAuth2" section and select the option "bot" under "OAuth2 URL Generator" section.
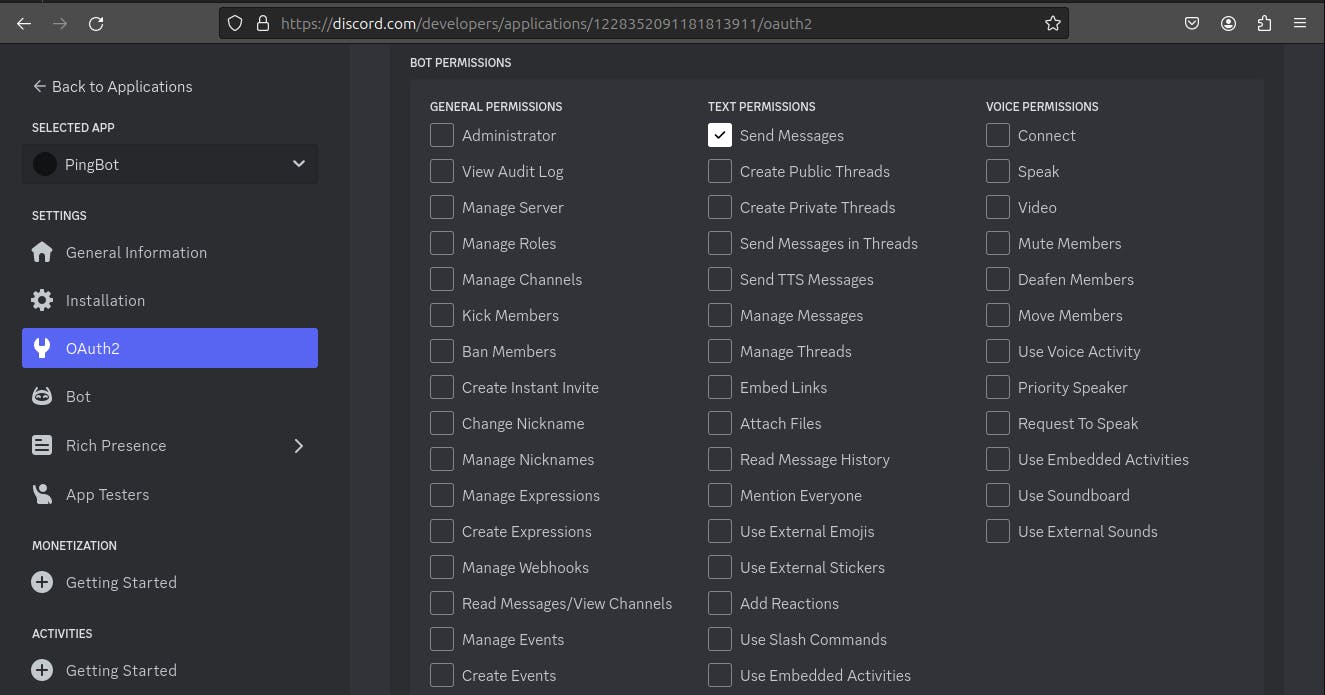
Review the permissions in the "Bot Permissions" section and select the ones you want to grant the bot and copy the URL generated.
In this blog, we will learn to setup a command.
Note - Commands are nothing but an argument initialized by a forward slash i.e. "/".

In a new browser window, open the URL and select the server in which you want to add the bot.
Congratulations ! you have successfully added your first bot to your server.
Now, it's time to add some commands to which our bot will respond.
Create a new "npm project" and install "discord.js".
npm install discord.js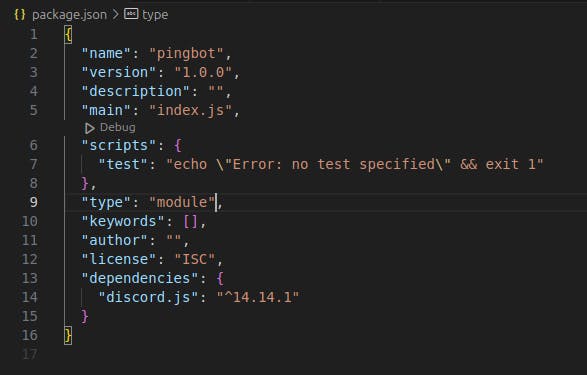
Add "type": "module", to your package.json file.
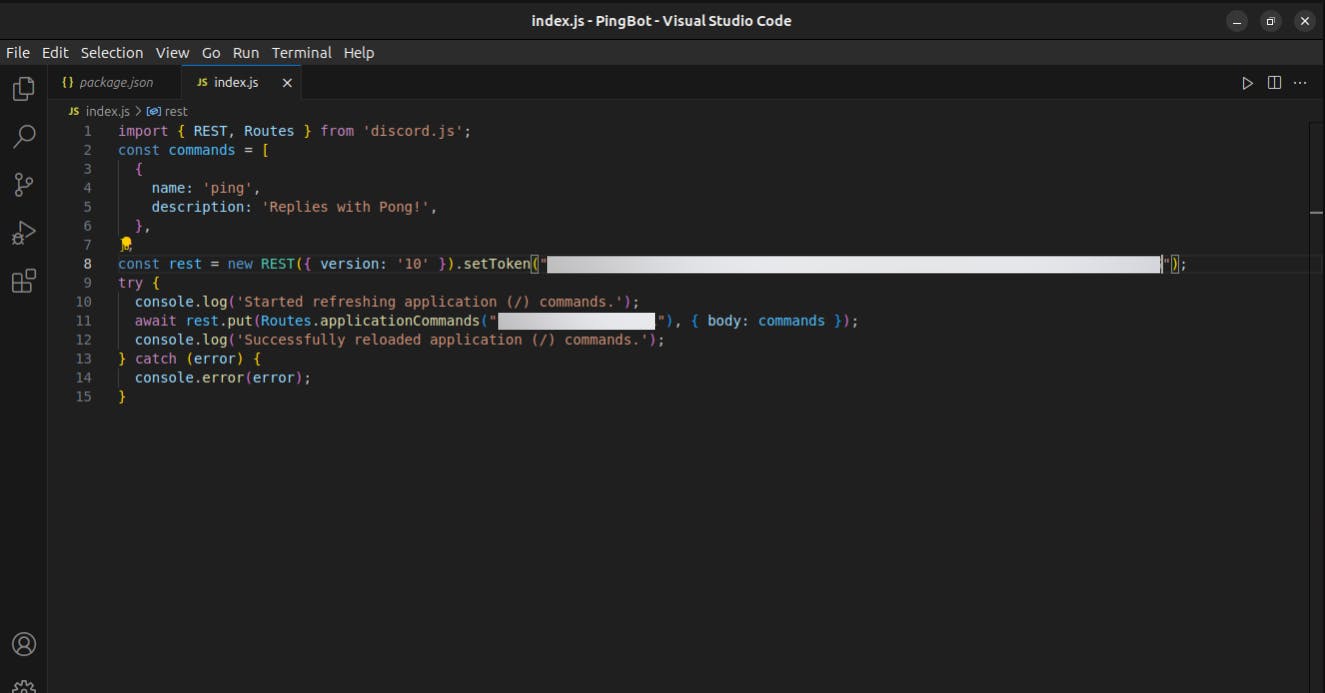
Create a file in the same directory. Name it anything, let's say, "command.js".
 import { REST, Routes } from 'discord.js';
 const commands = [
   {
     name: 'ping',
     description: 'Replies with Pong!',
   },
 ];
 const rest = new REST({ version: '10' }).setToken(TOKEN);
 try {
   console.log('Started refreshing application (/) commands.');
   await rest.put(Routes.applicationCommands(CLIENT_ID), { body: commands });
   console.log('Successfully reloaded application (/) commands.');
 } catch (error) {
   console.error(error);
 }
Write this entire code in "command.js" file. Here, a command named "ping" is being registered.
Now, there are two variables that needs to be replaced.
TOKEN
CLIENT_ID
Now, the question is where will these variable come from ?
Click the "Reset Token" button in the "TOKEN" section. It will generate a token. Replace the variable "TOKEN" with this token.
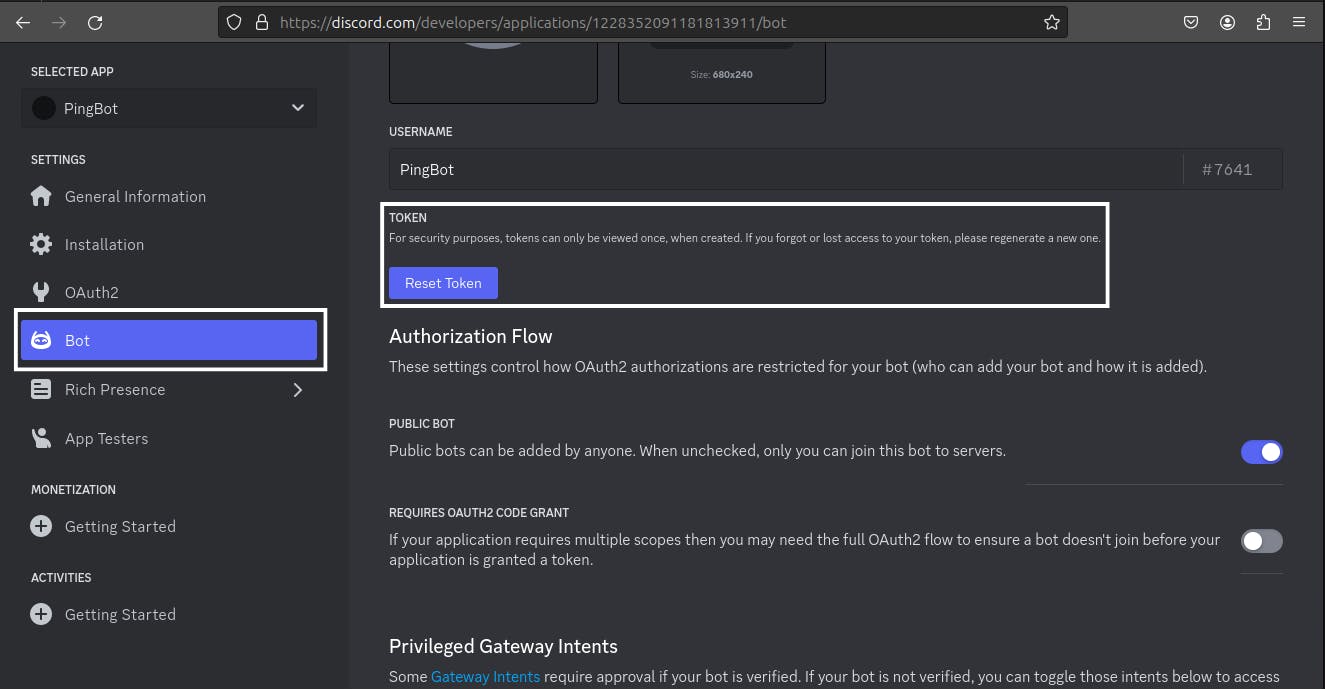
Now, for the "CLIENT_ID", go to "OAuth2" and under the "Client information" section, there will be a "CLIENT ID". Replace the CLIENT_ID variable with this client id.
Note - Do not share the TOKEN and Client_ID with anyone.
Now run the following command in terminal.
node command.js"ping" command will be registered.
Create a file in the same directory. Name it anything, let's say, "index.js".
 import { Client, GatewayIntentBits } from 'discord.js';
 const client = new Client({ intents: [GatewayIntentBits.Guilds] });
 client.on('ready', () => {
   console.log(`Logged in as ${client.user.tag}!`);
 });
 client.on('interactionCreate', async interaction => {
   if (!interaction.isChatInputCommand()) return;
   if (interaction.commandName === 'ping') {
     await interaction.reply('Pong!');
   }
 });
 client.login(TOKEN);
Write this entire code in "index.js" file. Replace the variable "TOKEN" with the token.
In this code ,
 if (interaction.commandName === 'ping') {
     await interaction.reply('Pong!');
 }
these lines mean if any user types "/ping" in the server, this bot will reply with "Pong!".
Now run the following command in terminal.
node index.js
Congratulations! Your bot is activated.
Now if any user types "/ping", the bot will reply with "Pong!". Of course, you can add more commands.
For more functionalities, you can refer to the documentation of "discord.js".
LINK - https://discord.js.org/
Conclusion
I hope you understood the whole process of setting up your own custom bot for your discord server. If you face any issues, write in the comments and I will try to help you out.